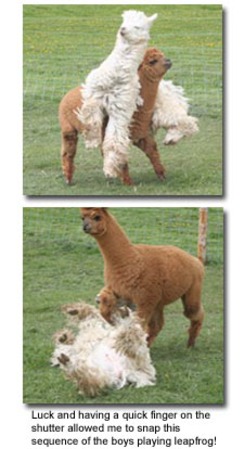
|
December 12, 2011
Creating Great Alpaca Photos
By: Tim Sheets

"Good livestock photography stands out because of its rarity," Darol Dickinson noted in the introduction to his book, Photographing Livestock: the Complete Guide. Why? Because photographing livestock is so tricky. It seems an infinitely complex mix of animals, people, actions, lighting, weather, settings, purposes and other considerations, often requiring action within the blink of an eye. Not only is it tricky, livestock photography can be downright difficult. "This was some of the hardest work I've ever done," agricultural writer Lee Pitts once confessed. "You'd jostle with an obstinate beast for hours to get the pose right, and then a telephone pole would be growing out of its back, the animal would decide to go wee-wee or would tire of the whole ordeal and boost you over a fence." Still, by understanding some basic techniques and with a little practice, you can produce some great alpaca photographs. Time spent on the farm and in the field is precious, so make the most of it by practicing and applying some of these skills. A few tips for successUse the right equipment for your purpose. Digital technology is revolutionizing photo-imagery and digital cameras make posting images to the internet a breeze.
Buy the best quality of digital camera and lenses you can afford. But, the camera with the most mega pixels
is not necessarily the best.
The best time of day for good natural lighting is early in the morning or late in the afternoon when the sun is soft. Avoid the glare of the mid-day sun when the shadows are harsh and unflattering for both people and animals. One of the best lighting conditions is a bright cloudy day. With this diffuse light, you don't have to deal with difficult exposure problems caused by harsh shadows.
For the sharpest possible pictures, keep the camera steady. Brace it against your face, keep your arms against your body and plant your feet slightly apart. Gently squeeze the shutter - don't jab. If there is a post or other steady object nearby, lean against it.
Most digital cameras are auto-focusing, but you can still have disappointing results if you do not point the focusing eye (an indicator in your viewfinder) at the part of the subject you want to be in sharpest focus. Consult your camera manual for specific instructions on how to use auto-focus to its fullest advantage.
Practice good composition by cropping your photographs in your camera. Begin shooting your images from the distance you feel is right, and then gradually zoom in closer. Some of the best images are extreme close-ups. Move in as close as possible and fill your viewfinder with as much of the subject as you can.
Be careful not to cut off feet or ears. You need to know how much of the subject in your viewfinder will be recorded in the camera because it's not always what you see. Tilt your camera sideways to see which composition makes the best statement for the intended purpose.
Strive to keep your composition simple - concentrate on one idea at a time. Before shooting, look closely through the viewfinder and eliminate any details that don't contribute to the idea you have in mind.
In theory, it is desirable for all animals in a group shot to be looking in the same direction. Practically, this is difficult to achieve so practice, practice, practice.
Make sure your background is free of clutter. Poor backgrounds ruin more pictures than any other factor except for exposure. If the background is good, it will generally add to the composition and set the mood. If it is bad, if will greatly detract for the final effect.
Shoot light colored alpacas against a dark background. Solid evergreen trees make an excellent background for a white animal. Try to capture dark animals against the sky or other lightly colored backgrounds.
Make sure your digital photo is taken and/or saved at the proper resolution for it's intended use.If you like this article, please...  |